Understanding and Testing Your Golf Cart Solenoid: A Comprehensive Guide.
The golf cart solenoid plays a crucial role in your cart’s function, acting as the main electrical switch in the power system. When you press the accelerator, the solenoid closes the circuit, enabling electrical energy to flow from the battery to the cart’s motor, thus propelling the vehicle forward. Therefore, a faulty solenoid can significantly impede your golf cart’s performance. This article aims to guide you through the process of testing your golf cart solenoid.
Before we begin, it’s essential to understand the risks involved in working with electrical components. The process involves dealing with high voltages that can cause serious harm if not handled correctly. If you are not comfortable or experienced in handling electrical systems, it’s advisable to hire a professional. However, if you have basic electrical knowledge and follow the instructions carefully, you can safely perform this task.
Firstly, you need a few basic tools: a voltmeter or multimeter, wrench, and protective gear (gloves and safety glasses). Make sure your golf cart is switched off, and the key is removed before starting any testing.
Step 1: Locate the Solenoid
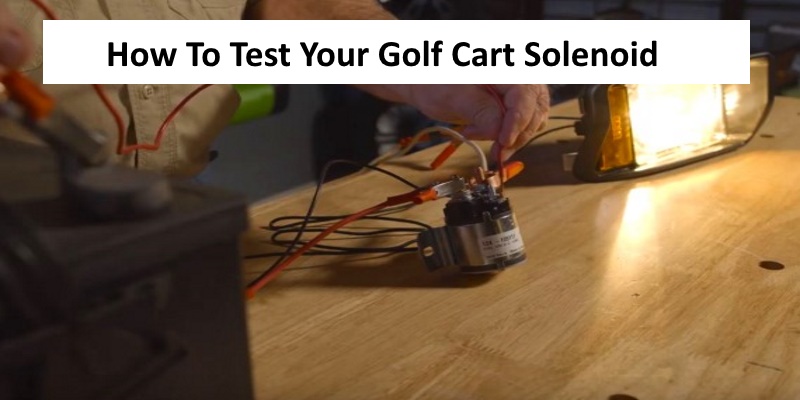
The solenoid is typically located under the seat of the golf cart, near the battery compartment. It’s a small cylindrical or square device with two large cables connected to it. The cables link the battery to the cart’s motor.
Step 2: Preliminary Visual Inspection
Before proceeding to any electrical tests, perform a visual inspection of the solenoid. Check for signs of physical damage, such as burns, cracks, or corrosion. If the solenoid appears damaged, it’s likely that it needs to be replaced.
Step 3: Test for Continuity
The continuity test checks whether a continuous electrical path is present across the two large terminals of the solenoid. To perform this test, set your multimeter to the resistance or ohms setting. Connect the probes to the two large terminals on the solenoid. If the multimeter reads infinite resistance (or no continuity), the solenoid is defective.
Step 4: Activation Test
The activation test checks whether the solenoid is operational when the accelerator is pressed. To perform this test, set your multimeter to the voltage reading (DC). Connect the negative probe to the main negative terminal of the battery and the positive probe to one of the small terminals on the solenoid. Now, ask an assistant to press the accelerator pedal. If the reading on the multimeter changes (usually to the battery’s voltage), this indicates that the solenoid is receiving an activation signal.
Step 5: Output Test
The output test checks if the solenoid is passing electricity to the motor when activated. For this, keep the multimeter on the voltage setting. Connect the negative probe to the main negative terminal of the battery and the positive probe to one of the large terminals on the solenoid. Have your assistant press the accelerator pedal again. If the multimeter reading changes, the solenoid is working correctly. If not, it might be faulty.
If your solenoid fails any of these tests, you will need to replace it. Ensure you purchase the correct replacement solenoid for your specific golf cart model.
Remember, when dealing with electrical components, safety is paramount. Always wear protective gear, and if you’re unsure about any of the steps or find the process too complex, don’t hesitate to contact a professional. A well-functioning solenoid is critical to the optimal performance of your golf cart, so don’t neglect this small yet significant component. Regular testing and maintenance can prevent sudden breakdowns and contribute to a smooth and enjoyable golfing experience.
Step 6: Replace the Faulty Solenoid
If you’ve determined that the solenoid is faulty, it’s time for a replacement. Here’s a basic guide:
Disconnect the Battery: Always disconnect the battery before replacing the solenoid to avoid any electrical accidents. The negative terminal should be disconnected first, followed by the positive one.
Remove the Old Solenoid: Locate the solenoid and take a picture or sketch a diagram of the wiring setup to ensure that you can correctly install the new one. Using a wrench, disconnect the wires attached to the solenoid’s terminals. Keep track of which wire goes where. Then, remove the solenoid from its mount.
Install the New Solenoid: Place the new solenoid in the mount, and connect the wires to the corresponding terminals, following the picture or diagram you made earlier. Ensure the connections are tight and secure.
Reconnect the Battery: After the new solenoid is properly installed, reconnect the battery, starting with the positive terminal, followed by the negative one.
Test the New Solenoid: Finally, turn on the golf cart and test the new solenoid using the steps outlined earlier. If everything is working correctly, you’ve successfully replaced your golf cart solenoid.
The key to any successful DIY project is patience and preparation. Understanding the operation of your golf cart’s solenoid and how to test it can save you both time and money. By knowing how to troubleshoot this crucial component, you can ensure your golf cart remains in top shape, allowing for a seamless drive on the course.
In conclusion, the golf cart solenoid, while small in size, is significant in its role. It’s a fundamental component of the vehicle’s electrical system and requires regular maintenance and checks. If you’re comfortable with basic electrical concepts and safety protocols, testing and even replacing your golf cart solenoid can be a manageable task. However, never hesitate to seek professional help if you’re uncertain about any part of the process.